Love an old hand-me-down chair or a vintage thrift-store find, but not so wild about its fabric? Easy fix, says Pamela Bowen, the self-taught owner of Meg and Me Upholstery. Find your dream fabric, she says, set aside a few “here and there” free-time hours, and get set for a can-do upholstery re-do. Not only will the end result breathe new life into your old find, it will also inject verve wherever you decide to showcase the chair. All that payoff for a few pennies—we like!
STEP 1: Use a flat-head screwdriver and needle-nose pliers to remove the old fabric and any staples or nails. Don’t rip or discard the old fabric; this will become your pattern. Leave cushioning in place.
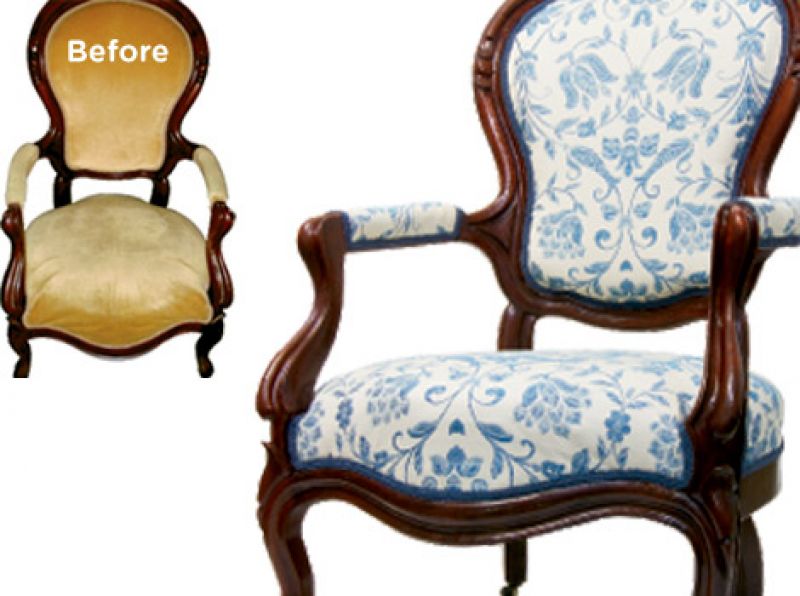
STEP 2: Spread your new fabric out flat. (We used Albemarle Capri by Beacon Hill through Robert Allen Design.)Overlay your old fabric atop the new so the grains from both are going in the same direction. Pin the old fabric in place.
STEP 3: Cut the new fabric in pieces that match the old.
STEP 4: Start with the interior chair back and place the new fabric in position on the cushioning. Pull fabric taut and staple four times in a “T” pattern, starting with one staple at the top, and then bottom and one in each side. Place remaining fabric pieces on chair, staple, and repeat until chair is roughly covered.
STEP 5: Staple between the initial points, pulling the fabric taut as you go. (Tip: If you encounter stubborn fabric, move on and come back to that spot later.)
STEP 6: To hide stapling work, glue a gimp (or flat trim) border around the edges of the fabric. Begin at the exterior back and use a hot glue gun to adhere gimp until chair is fully trimmed.